
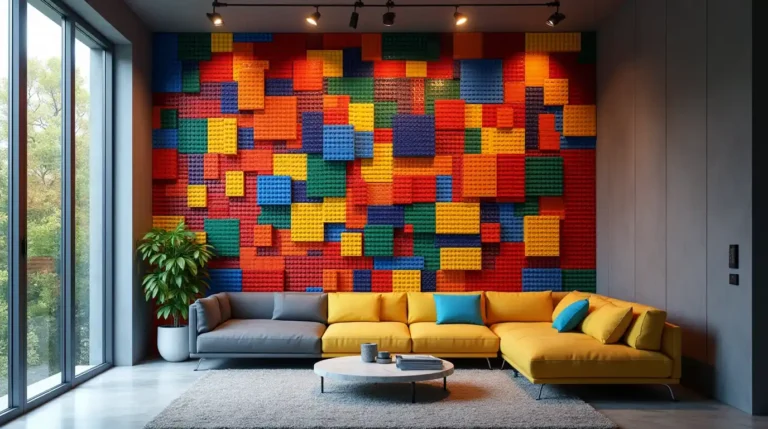
Have you ever dreamed of transforming a blank wall into a vibrant canvas of creativity? Imagine a space where every brick tells a story, where you’re not just decorating but building a personal work of art. In this guide, you’ll discover how to create your own custom LEGO wall—a project that combines fun, artistry, and the proven LEGO wall techniques used by AFOLs (Adult Fans Of LEGO) and creative DIY enthusiasts alike.
Whether you’re looking to create Textured LEGO walls that add a unique tactile quality, or a straightforward step-by-step guide to building LEGO walls that delivers a sturdy, stylish display, you’re in the right place. Follow these five essential steps to build a LEGO wall that’s as functional as it is inspiring.
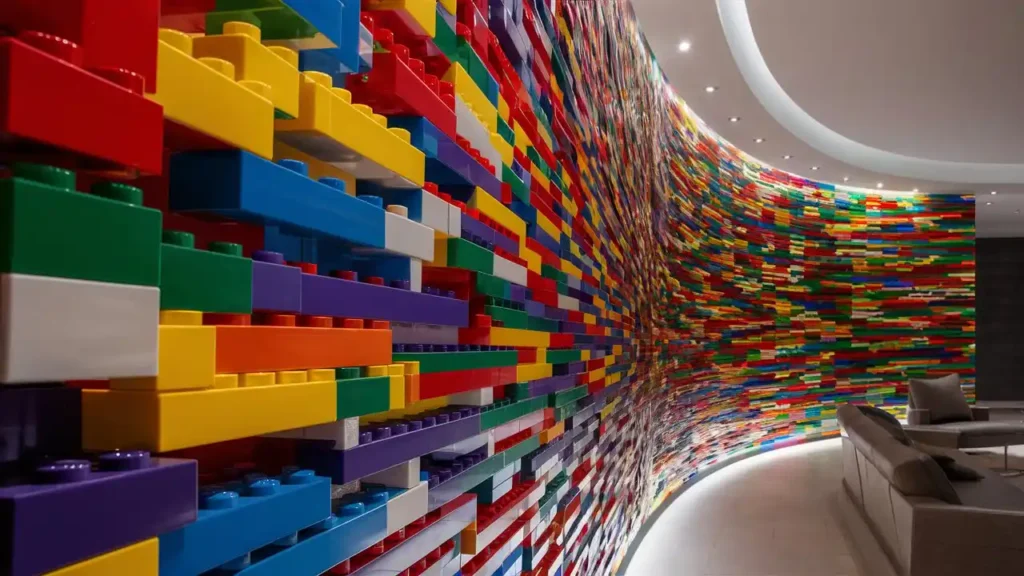
Table of Contents
Introduction – Why Build a LEGO Wall?

Building your own LEGO wall isn’t just a fun DIY project—it’s a journey that reconnects you with your childhood passion for LEGO while providing a creative outlet in your home or workspace. Think back to those days when every new creation sparked excitement and wonder. Now, as an adult, you have the opportunity to channel that same joy and ingenuity into a project that’s uniquely yours.
Imagine a wall adorned with LEGO wall art that you designed yourself—a piece that reflects your personality, style, and creativity. Whether you’re an AFOL or simply a lover of DIY projects, building a custom LEGO wall offers an immersive experience:
- Personal Expression: Create designs that resonate with your taste.
- Functional Decor: Use it as a display for your favorite memorabilia or a creative background for your workspace.
- Community Connection: Share your build ideas with fellow enthusiasts and join the conversation on LEGO wall ideas and creative LEGO wall designs for inspiration.
Step 1 – Planning & Design Your LEGO Wall
Define Your Vision
Before you start snapping bricks together, take a moment to envision your ideal LEGO wall. Ask yourself:
- What purpose will your wall serve? (Is it a focal point in your living room, a playful accent in your kids’ room, or a creative project for your makerspace?)
- What style are you aiming for? Do you prefer a classic LEGO brick wall look, or are you drawn to a more sophisticated LEGO stone wall design?
When brainstorming, jot down ideas under headings like:
- Functional vs. Decorative: Decide whether you want a building LEGO walls project that’s practical, such as storage or display, or a purely aesthetic piece.
- Inspiration Sources: Look up LEGO wall ideas online. Websites, AFOL forums, and DIY blogs are treasure troves of creative LEGO wall designs for inspiration.
Design Considerations & Techniques
Your design phase is where you decide on the details. Consider the following:
- Layout & Scale: Sketch a rough plan of your wall. Think about dimensions, placement, and symmetry. This will guide your choice of LEGO wall techniques such as:
- Overlapping LEGO bricks technique for walls
- Staggering LEGO bricks for curved walls
- Texture & Material: Do you want a smooth finish or a textured look? For a realistic appearance, incorporate LEGO wall texture using plates and tiles or try using modified bricks to create a rugged, LEGO stone wall effect.
- Advanced Techniques: If you’re feeling ambitious, explore methods like SNOT (Studs Not On Top), which allow for sleek, unconventional builds. Look up resources on SNOT LEGO wall techniques for smooth surfaces and SNOT LEGO wall construction methods.
Taking time to plan not only clarifies your vision but also ensures your build is structurally sound and visually captivating.
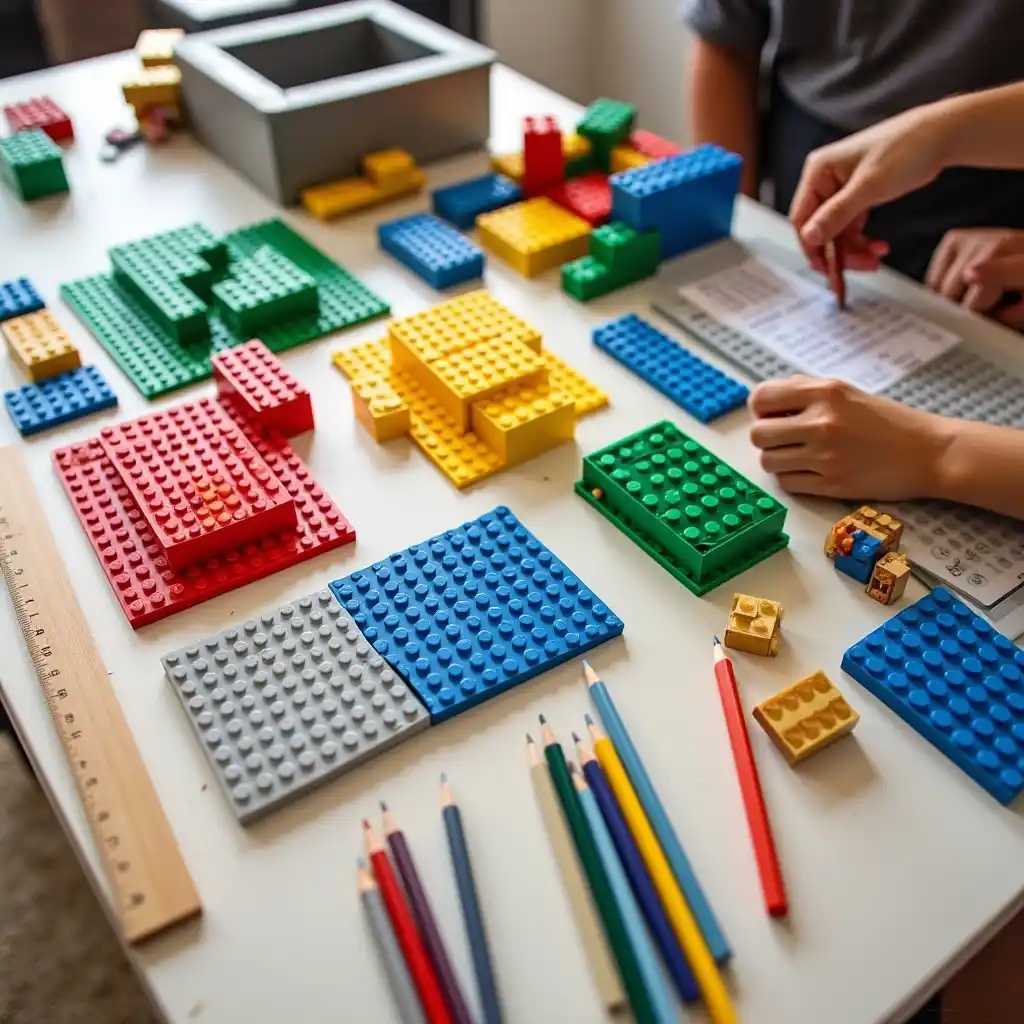
Step 2 – Gather Materials & Tools

A successful DIY project starts with the right materials. Here’s a handy table to help you organize your supplies:
| Item | Description | Notes/Source |
|---|---|---|
| LEGO Baseplates | The foundation for your wall | Available online or at toy stores |
| LEGO Bricks & Plates | In various colors and textures (for LEGO brick wall and LEGO stone wall effects) | Consider bulk buying |
| Adhesive/Mounting System | A strong, removable adhesive (or a PlayUp wall installation guide system) for securing your wall | Check DIY forums for recommendations |
| Design Tools | Pencil, ruler, sketch paper, and markers for planning and layout | Office or craft supply store |
| Additional Accessories | Items for added flair: decorative elements, minifigures, or mosaic pieces for LEGO wall art | Personal choice |
By ensuring you have all necessary items at hand, you save time and reduce interruptions during your build. This stage is crucial if you plan on creating Building LEGO walls for large scale models or using advanced LEGO wall building techniques.
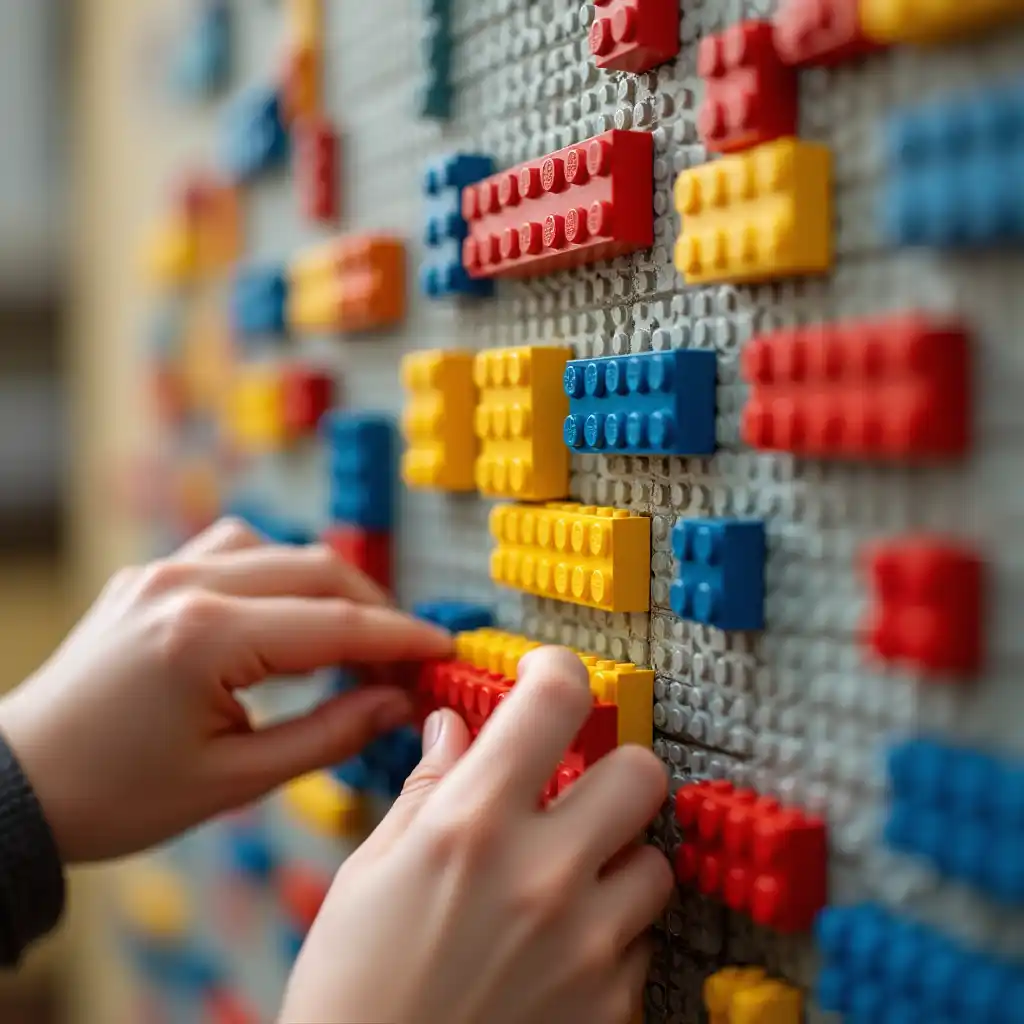
Step 3 – Build a Strong Base
Laying a Solid Foundation
The key to a durable LEGO wall is a stable base. Here’s a straightforward process to ensure your wall stands the test of time:
- Prepare the Surface:
- Clean your wall or mounting surface thoroughly.
- Ensure it’s smooth and dry to promote strong adhesion.
- Arrange Your Baseplates:
- Lay out your LEGO baseplates according to your design sketch.
- Use a level and measuring tape to verify alignment.
- Consider using techniques like LEGO wall building techniques for strength to guide your placement.
- Secure the Baseplates:
- Apply a high-quality adhesive or follow your PlayUp wall installation guide to mount the baseplates securely.
- Check for any gaps that could lead to instability; remember, LEGO wall techniques to avoid stability issues are paramount.
- Test the Setup:
- Gently press on the base to ensure it holds firm.
- Make adjustments if necessary before moving on to the assembly phase.
A strong foundation is essential. Think of it as the canvas on which you’ll build your masterpiece.
Step 4 – Assemble & Texture Your LEGO Wall
Step-by-Step Construction
Now it’s time to bring your design to life. Follow these steps to assemble your LEGO wall:
- Start at the Bottom:
Begin with the lower rows. This ensures stability and makes alignment easier as you work upward. - Apply Overlapping & Staggering Techniques:
- Use the Overlapping LEGO bricks technique for walls to interlock the bricks.
- Incorporate the Staggering LEGO bricks for curved walls method to add visual interest and structural support.
- Build Gradually:
- Add layers one row at a time.
- Periodically step back and review your work to ensure everything remains aligned and secure.
Adding Texture & Detail
A plain wall might be strong, but you want your wall to inspire. Here’s how to add that extra spark:
- Incorporate Textures:
- Utilize LEGO wall texture ideas by mixing different brick types such as plates, tiles, and modified bricks.
- For a rugged look, consider How to create realistic LEGO stone walls by blending brick and plate elements.
- Advanced Building Techniques:
- Experiment with SNOT techniques to create smooth surfaces or unexpected angles.
- Use LEGO wall angled techniques using turntables if you’re aiming for curves or unique designs.
- Creative Accents:
- Integrate decorative features that qualify as Easy LEGO wall art projects. These might include mosaic patterns or even a dedicated section of LEGO wall art ideas for adults.
- Mix in different color schemes or even thematic elements based on your space (for instance, LEGO wall ideas for kids’ rooms versus more mature designs).
By combining these approaches, you’ll be using Advanced LEGO wall building techniques that not only strengthen your wall but also transform it into a visually striking piece.
Step 5 – Finishing Touches & Customization
Enhancing Your Build with Art & Accessories
The final phase is where you let your creativity shine. Customize your LEGO wall to make it uniquely yours:
- Personalize with LEGO Wall Art:
- Add decorative elements or motifs that reflect your personal style.
- Consider creating a section dedicated to Creating mosaic LEGO wall art or even a gallery of Unique LEGO wall art ideas.
- Tailor for Specific Spaces:
- If your wall is in a child’s room, explore LEGO wall ideas for kids’ rooms.
- For a sophisticated touch in a living area, use LEGO wall art ideas for adults to guide your choices.
- Installation and Adjustments:
- Verify that your wall is securely mounted, especially if using a system like PlayUp wall LEGO compatibility.
- Follow any specific directions from your adhesive/mounting system instructions (refer to your PlayUp wall installation guide).
- Make any final adjustments to ensure evenness and stability.
Maintenance & Future Upgrades
Your custom LEGO wall is a dynamic work of art that can evolve with you. Consider:
- Regular Checks:
- Periodically inspect for loose bricks and re-secure them as needed.
- Upgradability:
- Update your design with new bricks or reconfigure elements to keep the look fresh.
- Community Sharing:
- Join AFOL forums or local DIY groups to share tips on AFOL LEGO wall building techniques and get fresh ideas for future projects.
FAQ – Your LEGO Wall Questions Answered
Frequently Asked Questions
Q: How do I build a strong LEGO wall?
A: You can achieve a sturdy build by following proper base techniques and using reliable LEGO wall building techniques for strength. Ensure that your baseplates are firmly attached and use overlapping brick layouts to avoid stability issues.
Q: What techniques can I use to add texture to my LEGO wall?
A: For a textured finish, try mixing plates and tiles with modified bricks. Experiment with LEGO wall texture using plates and tiles and consider methods such as Techniques for building textured LEGO walls and Creating textured LEGO stone walls for a more realistic look.
Q: What is SNOT, and how can it improve my build?
A: SNOT (Studs Not On Top) allows you to create smooth surfaces and unique angles. Incorporate SNOT LEGO wall techniques for smooth surfaces to enhance your design, especially if you want a modern, sleek look.
Q: Can I customize my LEGO wall for different spaces?
A: Absolutely! Whether you want LEGO wall ideas for kids’ rooms or LEGO wall art ideas for adults, you can adjust the design to fit the aesthetic of any room. Tailor your build by integrating elements of Creative LEGO wall designs for inspiration.
Q: How do I add decorative elements to my LEGO wall?
A: You can enhance your wall by adding mosaic elements or creating custom art sections. Consider projects like Easy LEGO wall art projects and explore Creating mosaic LEGO wall art to incorporate personal touches.
Conclusion – Enjoy Your Custom LEGO Wall Build!
In this comprehensive guide, you’ve learned how to plan, design, and build your very own custom LEGO wall in five clear steps. By following these instructions and employing techniques such as Overlapping LEGO bricks technique for walls, Staggering LEGO bricks for curved walls, and SNOT techniques for advanced LEGO wall designs, you’re well on your way to creating a masterpiece that is as durable as it is visually stunning.
You now have the tools, techniques, and creative ideas needed to bring your vision to life. Whether you’re an experienced AFOL or just starting your DIY journey, remember that every great build starts with a solid plan and a willingness to experiment. Share your progress, learn from others, and let your creativity shine—because your space deserves a touch of the extraordinary.
Call to Action:
Now it’s your turn! Gather your materials, set aside some creative time, and start building your custom LEGO wall today. Don’t forget to share your results on social media and with your local DIY community. Your creation might inspire someone else to embark on their own LEGO journey. Happy building!
1 thought on “Easy DIY LEGO Wall: 5 Steps To A Custom Build”