
1-Introduction
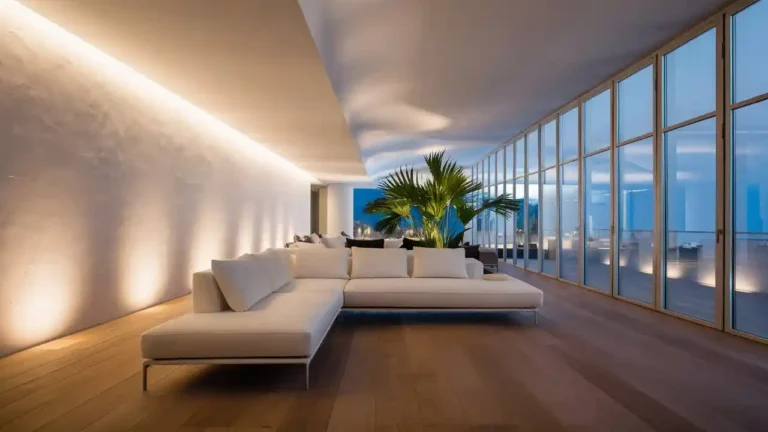
Imagine stepping into your home after a hectic day, closing the door behind you, and feeling an instant sense of calm. Your walls, far from mere boundaries, become the backdrop to every moment of your life—quiet mornings with coffee, impromptu dance sessions, or peaceful evenings with a good book. You deserve finishes that not only look stunning but also endure daily wear and tear. With the right plaster wall finishes, you can transform standard drywall into a tactile, visually captivating canvas that reflects your personality and lifestyle. In this comprehensive guide, you’ll learn everything—from identifying the perfect finish for your space to mastering application techniques and budgeting wisely—so that your walls remain both beautiful and durable for years to come.
Table of Contents
2-Understanding the Main Types of Plaster Finishes
Smooth Plaster (Skim Coat)
When you hear “skim coat,” think of the silken surfaces of luxury hotels and high-end galleries. A skim coat involves applying a thin layer (typically 1–2 mm) of gypsum or cement‐based plaster, then smoothing it with a trowel or squeegee.
- Ideal Applications
- Contemporary living rooms where you want a blank canvas for bold art pieces
- Hallways and entryways that require a flawless backdrop for lighting features
- Key Advantages
- Seamless look: Eliminates minor cracks and nail holes in drywall.
- Paint-ready surface: You can go straight to your favorite paint hue or wallpaper.
- Common Challenges
- Precision required: Over-troweling can leave ridges.
- Visible imperfections: Any substrate movement may surface as fine cracks, so structural stability is crucial.
- Pro Tip: Always apply between 60 °F and 80 °F; too cold, and the plaster sets poorly; too hot, and it dries too fast, compromising workability.
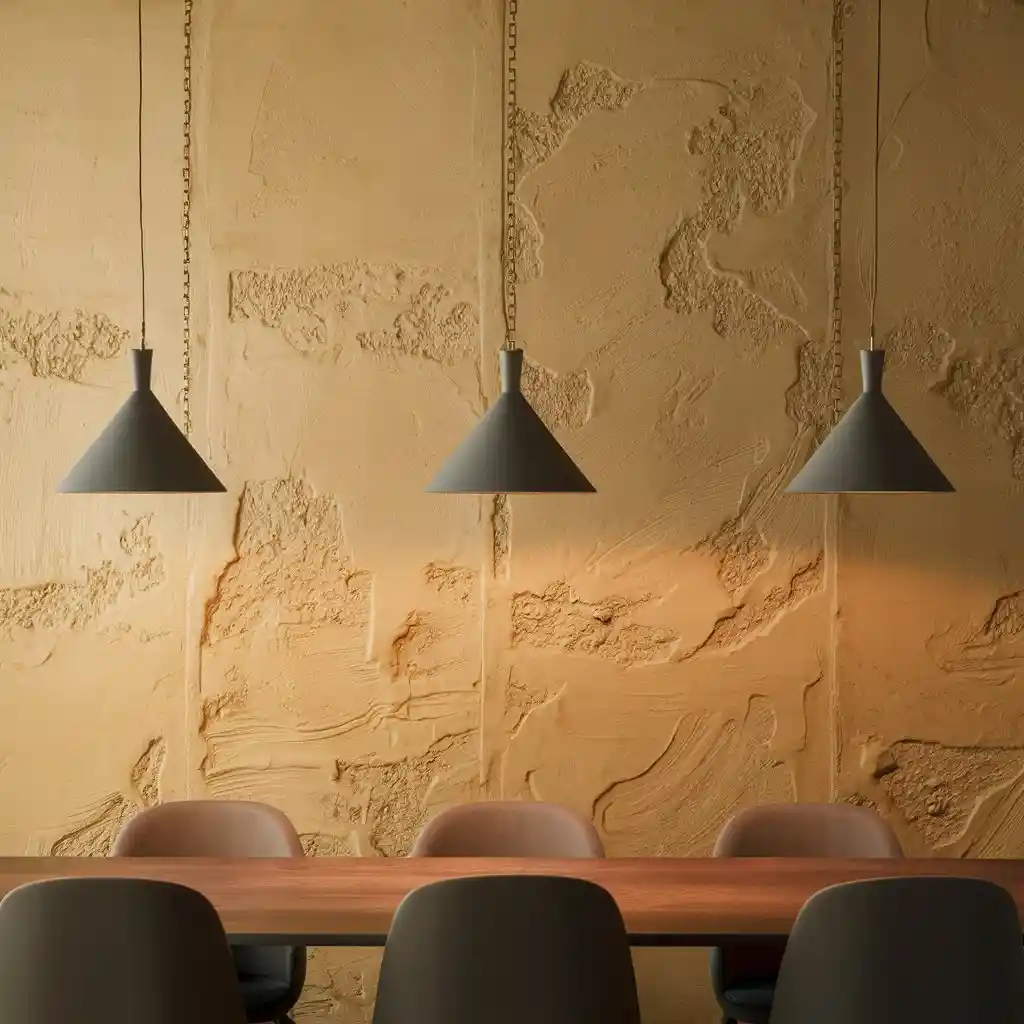
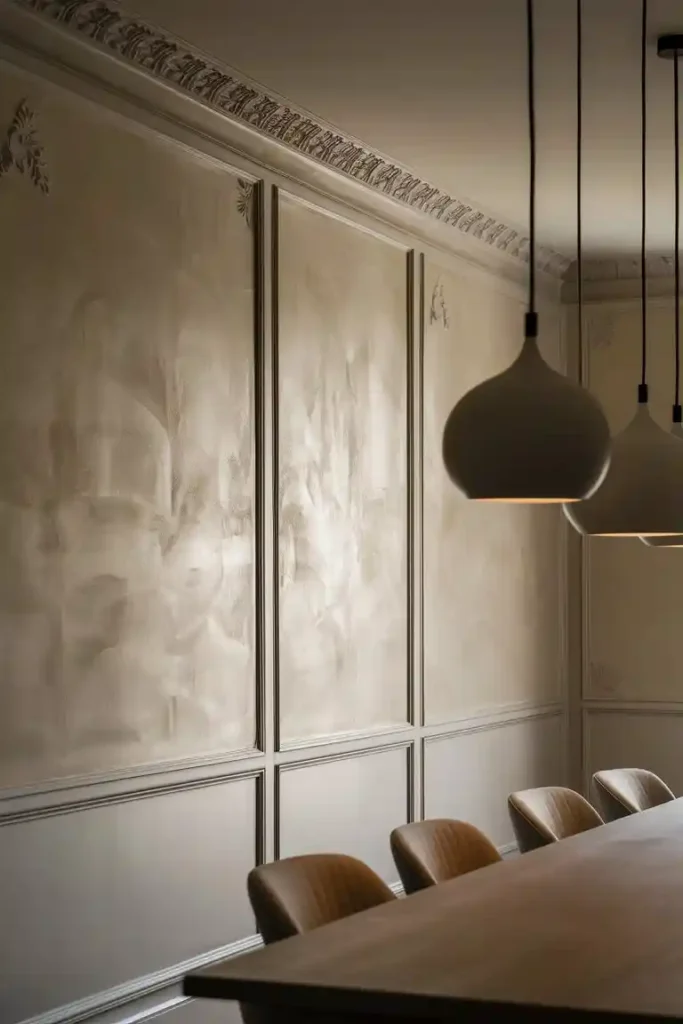
Textured Plaster
Textured finishes add depth and character to a room, giving walls a sense of craftsmanship. By adjusting grain size and application methods, you can dial in a look that ranges from barely-there suede to rugged, Old-World charm.
Variants of Texture
- Fine-Grain Texture
- Look & Feel: Soft, delicate undulations; ideal for subtle accent walls.
- Example: A muted taupe, fine-grain texture behind a gas fireplace creates a warm focal point without overwhelming the space.
- Medium-Grain Texture
- Look & Feel: Visible peaks and valleys that catch light, adding visual interest.
- Example: In a home office, medium grain in a deep charcoal shade can enhance focus and sophistication.
- Coarse-Grain Texture
- Look & Feel: Pronounced relief; evokes rustic or industrial aesthetics.
- Example: A living room feature wall with coarse texture in earthy ochre evokes Tuscan villa vibes.
Application Techniques
- Trowel Texturing: As you apply plaster, use the edge or corner of the trowel to create swoops, waves, or circular patterns.
- Sponge-Jet Method: Flick plaster onto the wall with a damp sponge for an organic, stone-like finish.
- Comb Technique: Run a notched comb through wet plaster for linear grooves—perfect for minimalist, tactile walls.
Specialized Finishes
Certain plasters go beyond basic texture or smoothness, offering luxury and resilience. These finishes often require additional materials or specialized tools but reward you with a unique, high-end look.
Venetian Plaster (Marmorino)
- Composition: Lime putty mixed with fine marble dust.
- Finish: Polished to a satiny sheen that mimics natural stone.
- Uses: Formal dining rooms, upscale reception areas, or any space where you want to showcase Italian craftsmanship.
- Maintenance: Periodic re-burnishing with a stainless-steel trowel restores shine.
Exterior Stucco
- Composition: Cement, sand, lime, and water.
- Performance: Excellent crack resistance and weather proofing when applied correctly in three coats.
- Color Options: Integrate integral pigments in shades of terra-cotta, sand, or soft gray.
- Installation Tip: Use fiberglass lath over wood framing to prevent delamination.
Pebble Dash / Roughcast
- Composition: Fine gravel, shells, or recycled glass chips embedded in cement-based plaster.
- Visual Impact: A rugged, dimensional surface that conceals imperfections and is extremely low-maintenance.
- Ideal Settings: Garden walls, pool surrounds, or rustic cabins where durability trumps delicacy.
Comparative Table of Finish Types
| Finish Type | Key Ingredients | Best Use Case | Avg. Cost (USD/m²) | Durability |
|---|---|---|---|---|
| Smooth Skim Coat | Gypsum, cement blends | Interior walls, paint ready | 15–25 | Medium |
| Fine Textured Plaster | Gypsum + additives | Accent walls | 20–30 | Medium–High |
| Venetian Plaster | Lime putty, marble dust | Luxury interiors | 40–60 | High |
| Exterior Stucco | Cement, lime | Outdoor façades | 25–35 | Very High |
| Pebble Dash / Roughcast | Cement + natural chips | Rustic exteriors | 20–30 | Very High |
3-Materials & Application Techniques
Selecting Your Plaster Material
Your choice of base material affects working time, breathability, and environmental impact.
- Lime Plaster
- Advantages: Natural antifungal properties; breathes, preventing moisture buildup.
- Best For: Historic restorations, bathrooms, basements.
- Gypsum Plaster
- Advantages: Quick setting (typically 20–40 minutes), ultra-smooth finish, minimal shrinkage.
- Best For: Dry interior walls and ceilings; over drywall or plasterboard.
- Cement Plaster
- Advantages: High compressive strength; excellent for exterior applications.
- Best For: Façades, fire-resistant walls, heavy-traffic zones.
Essential Tools for Perfect Results
Investing in quality tools not only makes your job easier but also elevates the final outcome.
- Trowel & Hawk: Hold and apply material with precision.
- Float (Sponge & Finishing): Guide floats to level and smooth the plaster surface.
- Joint Knife & Scraper: Remove excess material and refine edges.
- Notched Comb: Create linear patterns for combed textures.
- Polishing Pad: For burnishing Venetian and polished plasters.
Surface Preparation
- Inspection: Check for loose paint, grease, or crumbling substrate.
- Cleaning: Use a stiff brush or vacuum to remove dust and debris.
- Priming/Scratch Coat: Apply a bonding slurry or a first “scratch” coat to ensure subsequent layers adhere uniformly.
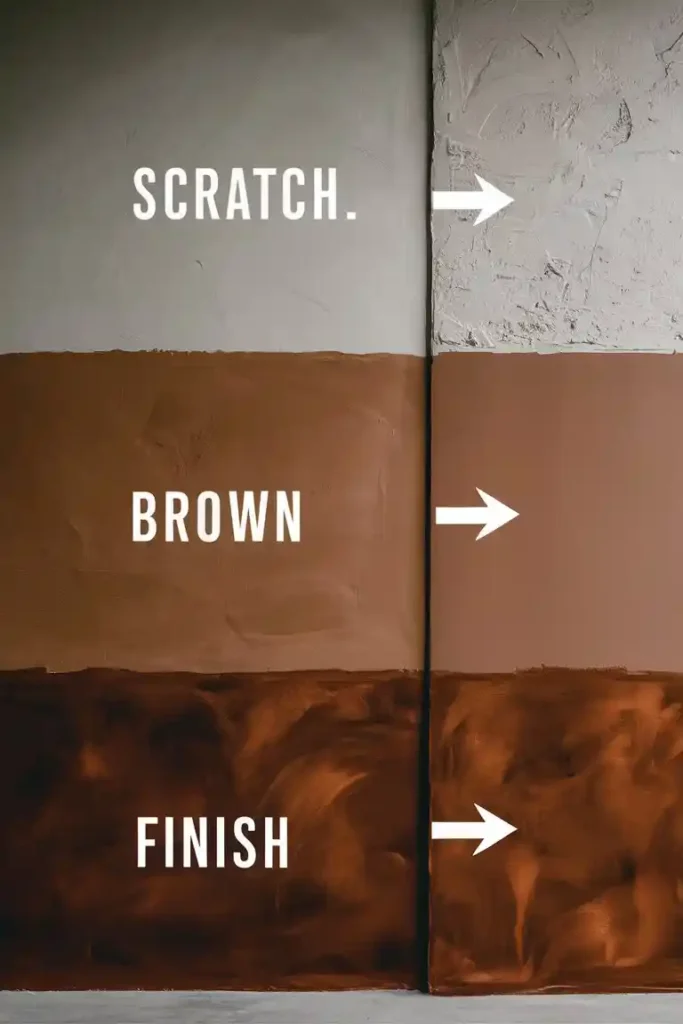
Three-Coat Application Process
- Scratch Coat (6–8 mm thick): Press firmly into the substrate to key the surface.
- Brown Coat (8–10 mm thick): Level the wall, filling low spots.
- Finish Coat (1–3 mm thick): Tailored to your desired texture or smoothness.
Timing: Allow 24–48 hours between coats for proper curing, extending to 72 hours in cooler climates.
4-Designer Styles & Trendy Finishes
Microcement
A super-thin (2–3 mm) cementitious overlay that delivers a seamless, industrial look without adding significant weight.
- Applications: Floors, countertops, walls, showers.
- Color Range: Ash gray, charcoal, taupe, custom tints.
- Waterproofing: Apply a clear sealer for wet areas.
Tadelakt
Hailing from Morocco, tadelakt is a lime-based plaster polished with river stones and treated with olive soap for a silky, waterproof finish.
- Unique Features: Slight undulation in the surface captures light differently throughout the day.
- Maintenance: Re-rub olive soap into the surface annually to maintain water resistance.
Stucco Veneziano
An evolution of Venetian plaster with a higher lime content for a pearlescent effect.
- Best Use: Feature walls, hotel lobbies, upscale boutiques.
- Application: Multiple thin layers, each burnished to peak shine.
Aggregate Embeds
Incorporate decorative aggregates—crushed marble, quartz chips, seashells—into your finish to create a customized, jewel-like appearance.
- DIY Tip: Broadcast aggregates onto a wet finish coat, then gently compact with a float.
5-Maintenance, Repair & Longevity
To keep your walls looking their best and maximize lifespan, follow these care guidelines:
- Cleaning Routine
- Dust surfaces weekly with a microfiber cloth.
- For stains, use pH-neutral soap and water—avoid harsh chemicals that can etch or discolor the finish.
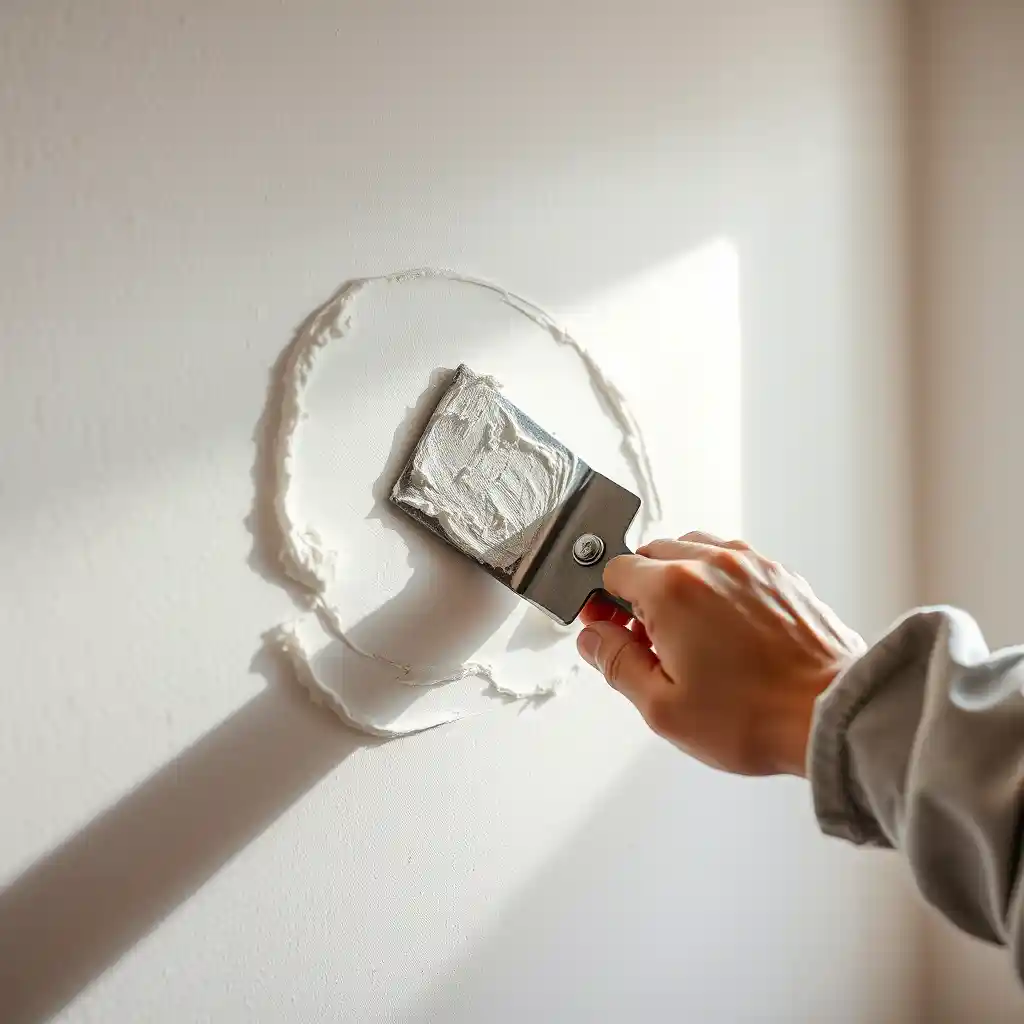
- Addressing Cracks
- Minor hairline cracks: fill with matching thin-set plaster or caulk, then blend with a damp sponge.
- Larger gaps (>1 mm): widen the crack slightly with a utility knife, push in repair plaster, then sand flush once dry.
- Preventive Measures
- Control indoor humidity (ideal range: 40–60 %) to prevent plaster expansion and contraction.
- Inspect annual seams around windows and doors; reapply sealant as needed.
With proper upkeep, cement and lime plasters can last over 50 years, while gypsum finishes may need light touch-ups every 10–15 years in high-traffic areas.
6-Eco-Friendly & Green Plaster Options
You don’t have to sacrifice sustainability for style. Consider these eco-conscious alternatives:
- Natural Lime Plasters
- Low embodied energy; carbon-sequestering over time as carbonation occurs.
- Mineral Pigments
- Earth-sourced oxides that deliver stable, fade-resistant color without volatile organic compounds (VOCs).
- Recycled Additives
- Fly ash (byproduct of coal plants), rice husk ash, or recycled glass can replace up to 30 % of cement content, reducing your carbon footprint.
Certifications to Look For:
- Cradle to Cradle Certified™
- GREENGUARD Gold
- Declare Red List Free
7-Cost & Budget Planning
Balancing aesthetics and finances doesn’t have to be a juggling act. Use this table to chart your investment:
| Budget Tier | Price Range (USD/m²) | Recommended Finish | Cost-Saving Strategy |
|---|---|---|---|
| Entry Level | 10–20 | Basic skim coat | Pre-mixed DIY kits; do small areas yourself |
| Mid Range | 20–40 | Fine textured plaster | Hire a student plasterer; limit high-end textures to one wall |
| Premium | 40+ | Venetian Plaster or Tadelakt | Splurge on focal points; alternate with smooth skim coat elsewhere |
Example Scenario: For a 200 ft² living room, a mid-range fine texture at $30/m² (≈$2.79/ft²) totals around $558. By limiting Venetian plaster to a single 50 ft² accent, you invest an extra $1,200—but gain a dramatic, gallery-quality statement.
8-FAQ (People Also Ask)
What’s the difference between lime and gypsum plaster finishes?
Lime plaster breathes, resists mold, and ages gracefully; gypsum sets faster and sands to a finer finish.
Can I apply plaster over an existing painted surface?
Only after thorough sanding and priming—or better yet, apply a scratch coat to ensure lasting adhesion.
Which plaster finish works best in a bathroom?
Tadelakt and microcement excel in wet areas thanks to their water-repellent properties.
How long does a plaster finish take to fully cure?
Gypsum: 2–3 days; Lime/Cement: up to 28 days for full carbonation and strength.
Is plaster more durable than painted drywall?
Yes—cement and lime plasters resist dents, moisture, and abrasion far better than standard drywall.
How do I repairé cracks in plaster wall finishes?
Widen hairline cracks slightly, fill with matching plaster compound, then sand flush and touch up the texture.
9-Conclusion & Call to Action
You’ve explored the spectrum of plaster wall finishes—from the velvety smooth skim coat to the timeless luxury of Venetian plaster and the rugged charm of pebble dash. You understand material choices, application steps, maintenance tips, and how to budget cleverly for your project. Now, it’s time to make your walls a testament to your vision and craftsmanship.
Take the Next Step: Download our Plaster Finish Calculator today to receive a personalized materials list and instant cost estimate. Share your progress—whether it’s a bold textured accent or a polished Venetian feature—with the community on Instagram using #MyPlasterPerfectWall. Let your walls tell your story, and inspire others to do the same!